Super Admin
System-wide administration for self-hosted deploymentsEdit
Super Admin provides platform-level management for self-hosted deployments, including user management, organization oversight, scheduler control, and system health monitoring.
Enable Super Admin
There are two ways to enable super admin access:
Recommended
Set the SUPER_ADMIN_EMAIL environment variable in your deployment:
SUPER_ADMIN_EMAIL=admin@yourdomain.comThe user with this email is promoted to super admin when the application starts.
Note: If the user has just signed up, you may need to restart the application container for the promotion to take effect, as this check runs during startup.
Run the bootstrap script inside the app container:
docker compose exec app npm run setup:admin admin@yourdomain.comTo downgrade a super admin to organization admin:
docker compose exec app npm run revoke:admin admin@yourdomain.comOverview
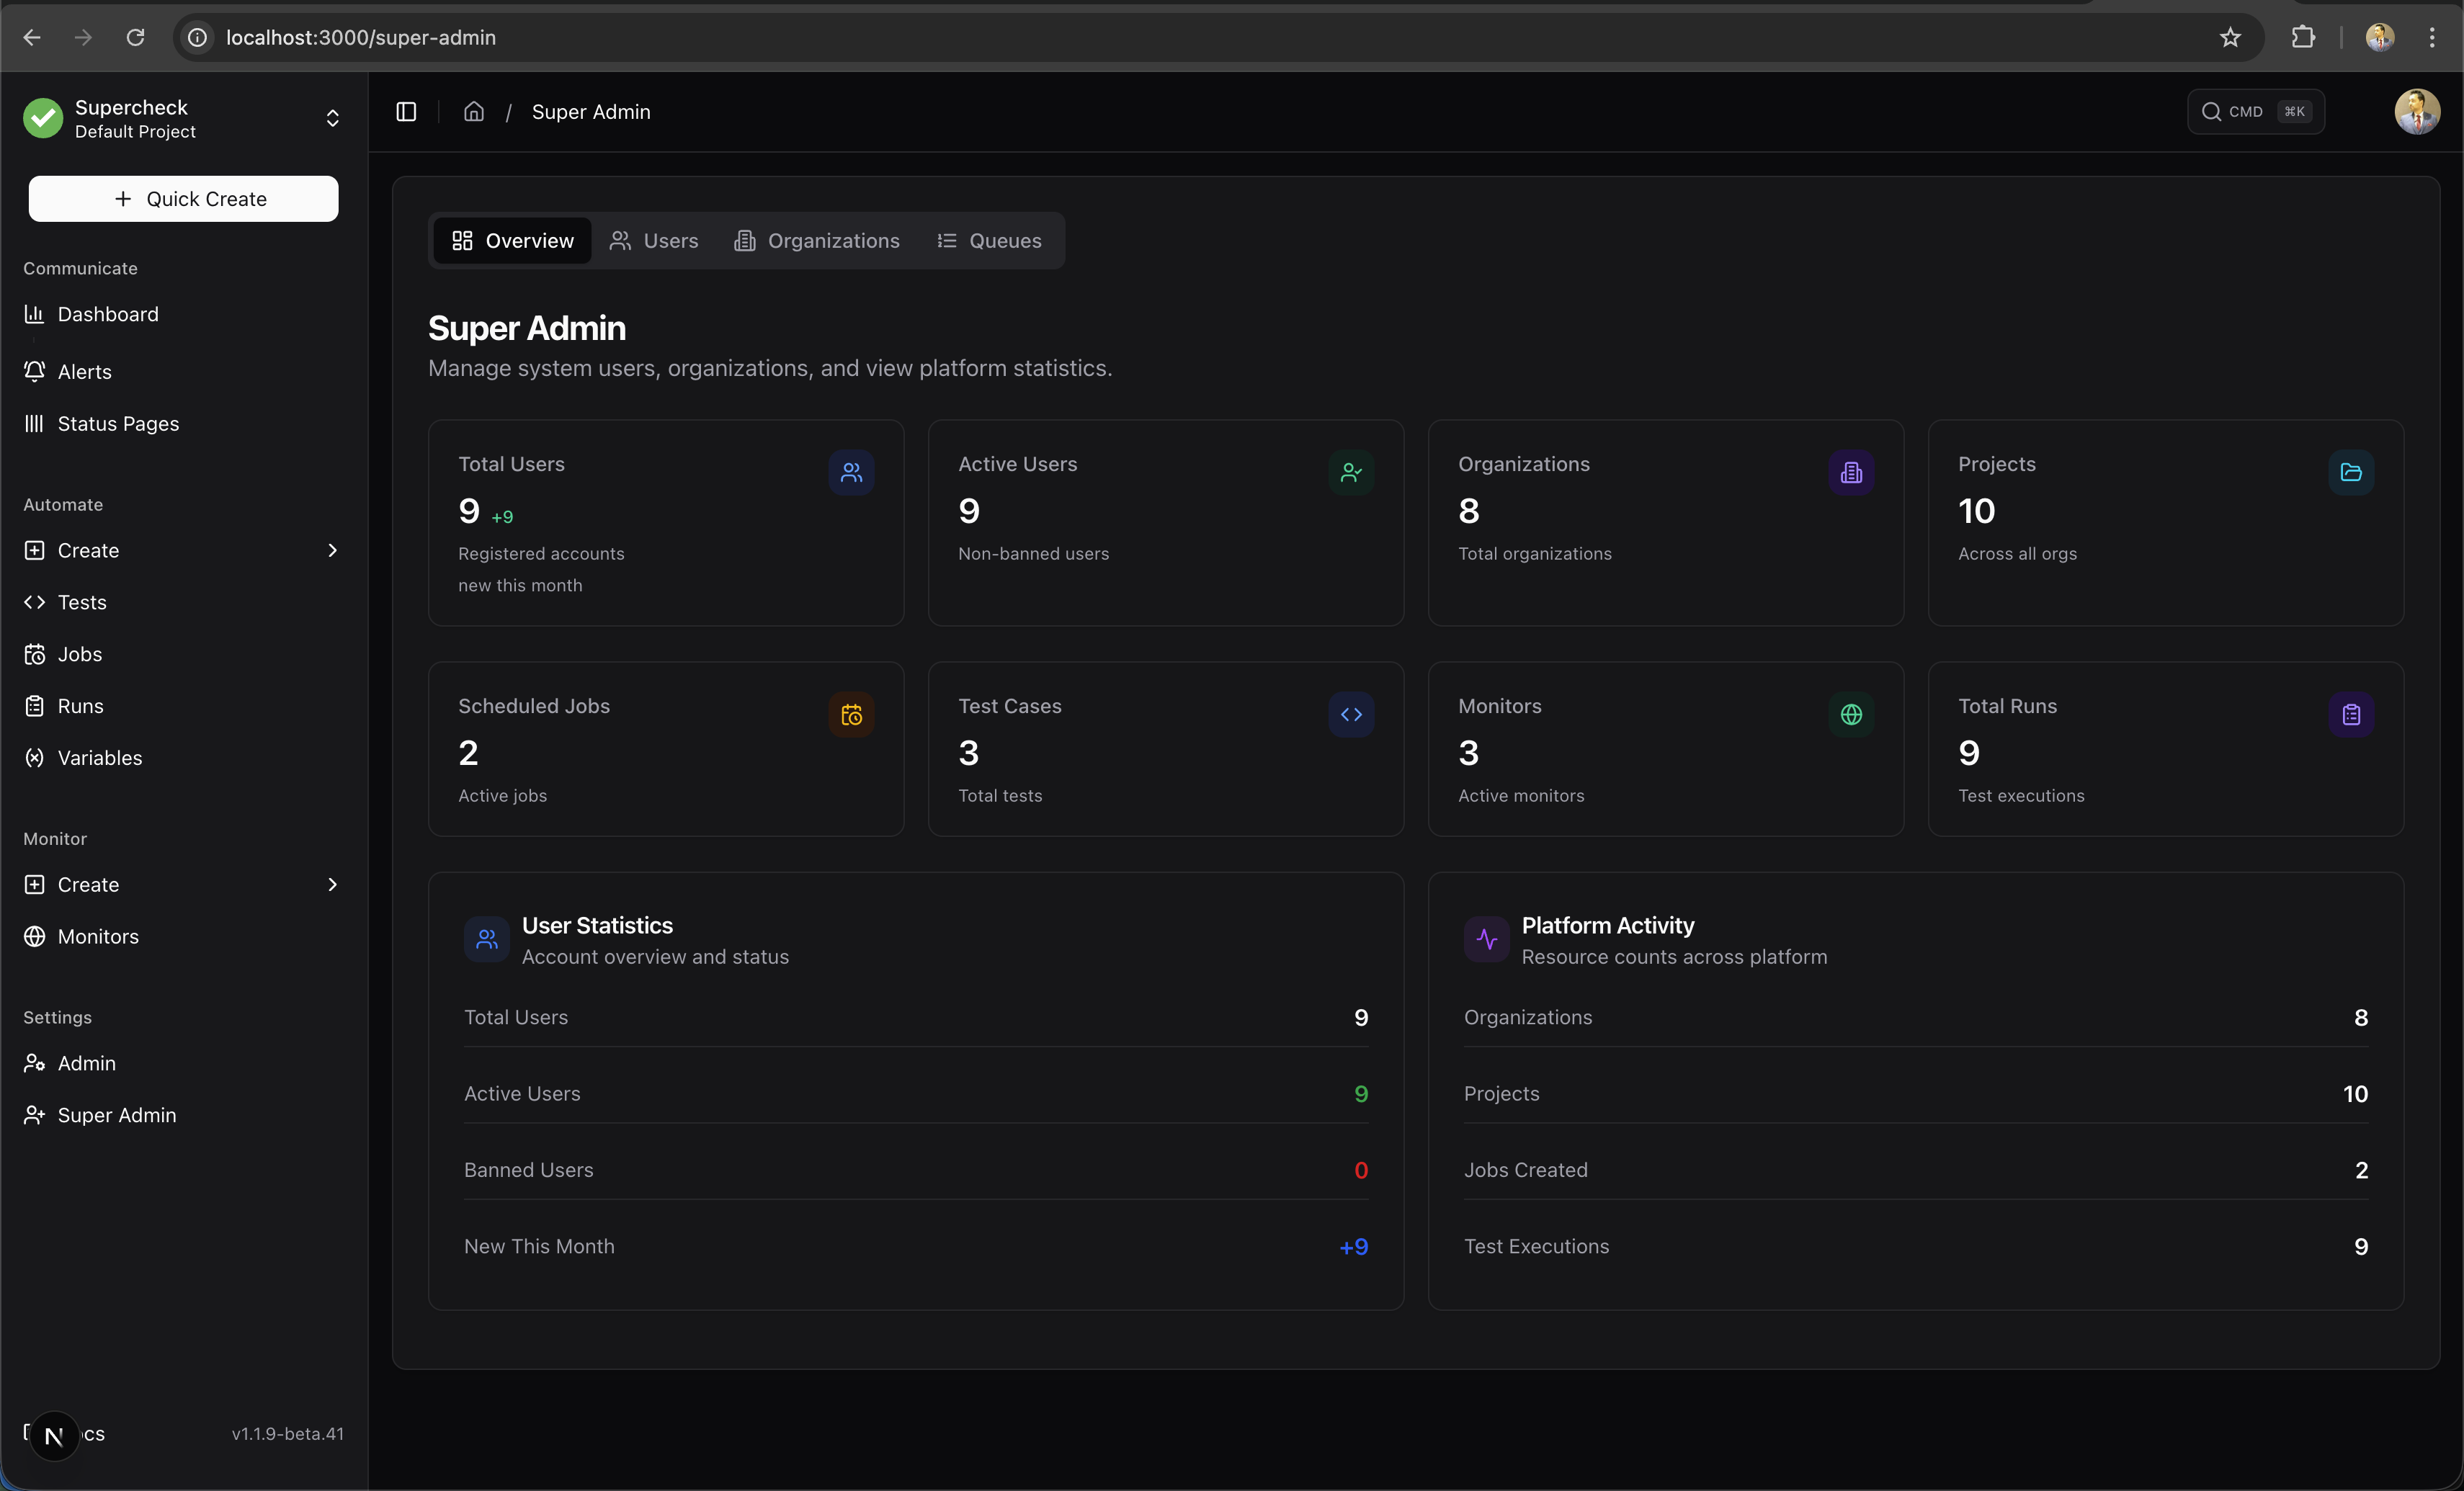
The Super Admin dashboard provides a system-wide view of all organizations, users, and queue status.
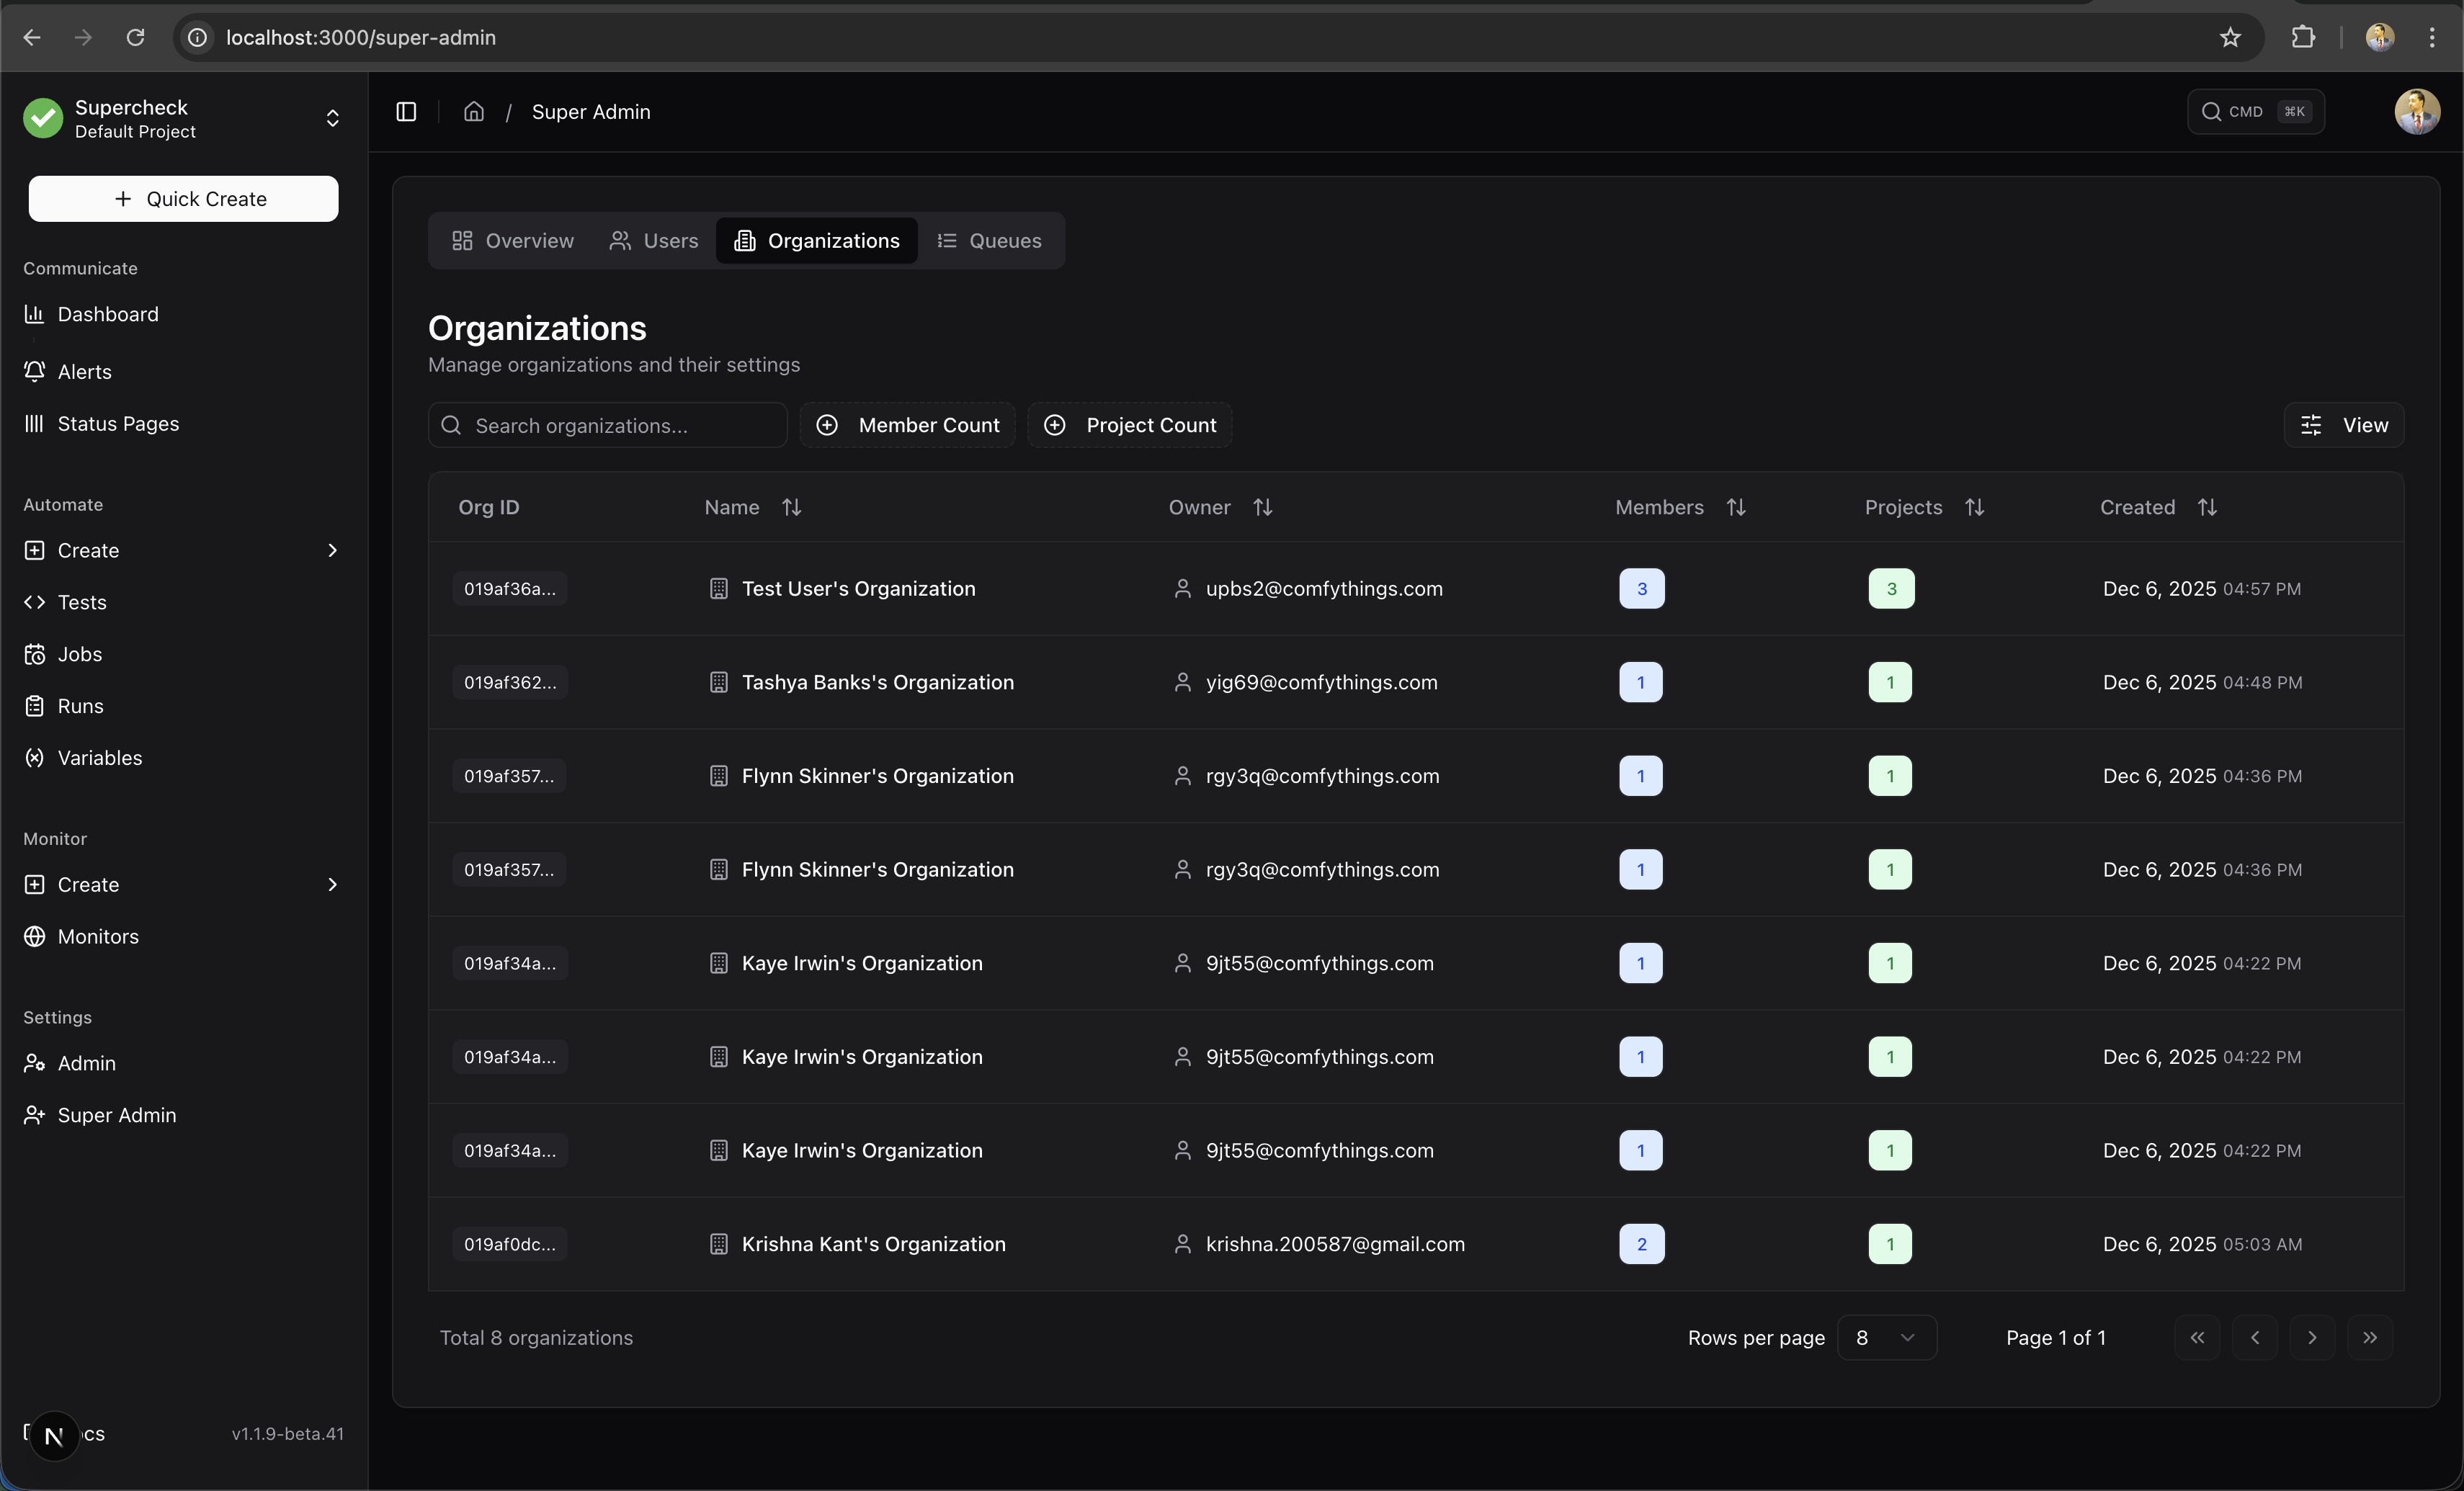
Organizations
View and manage all organizations in the system. See member counts, project counts, and organization status.
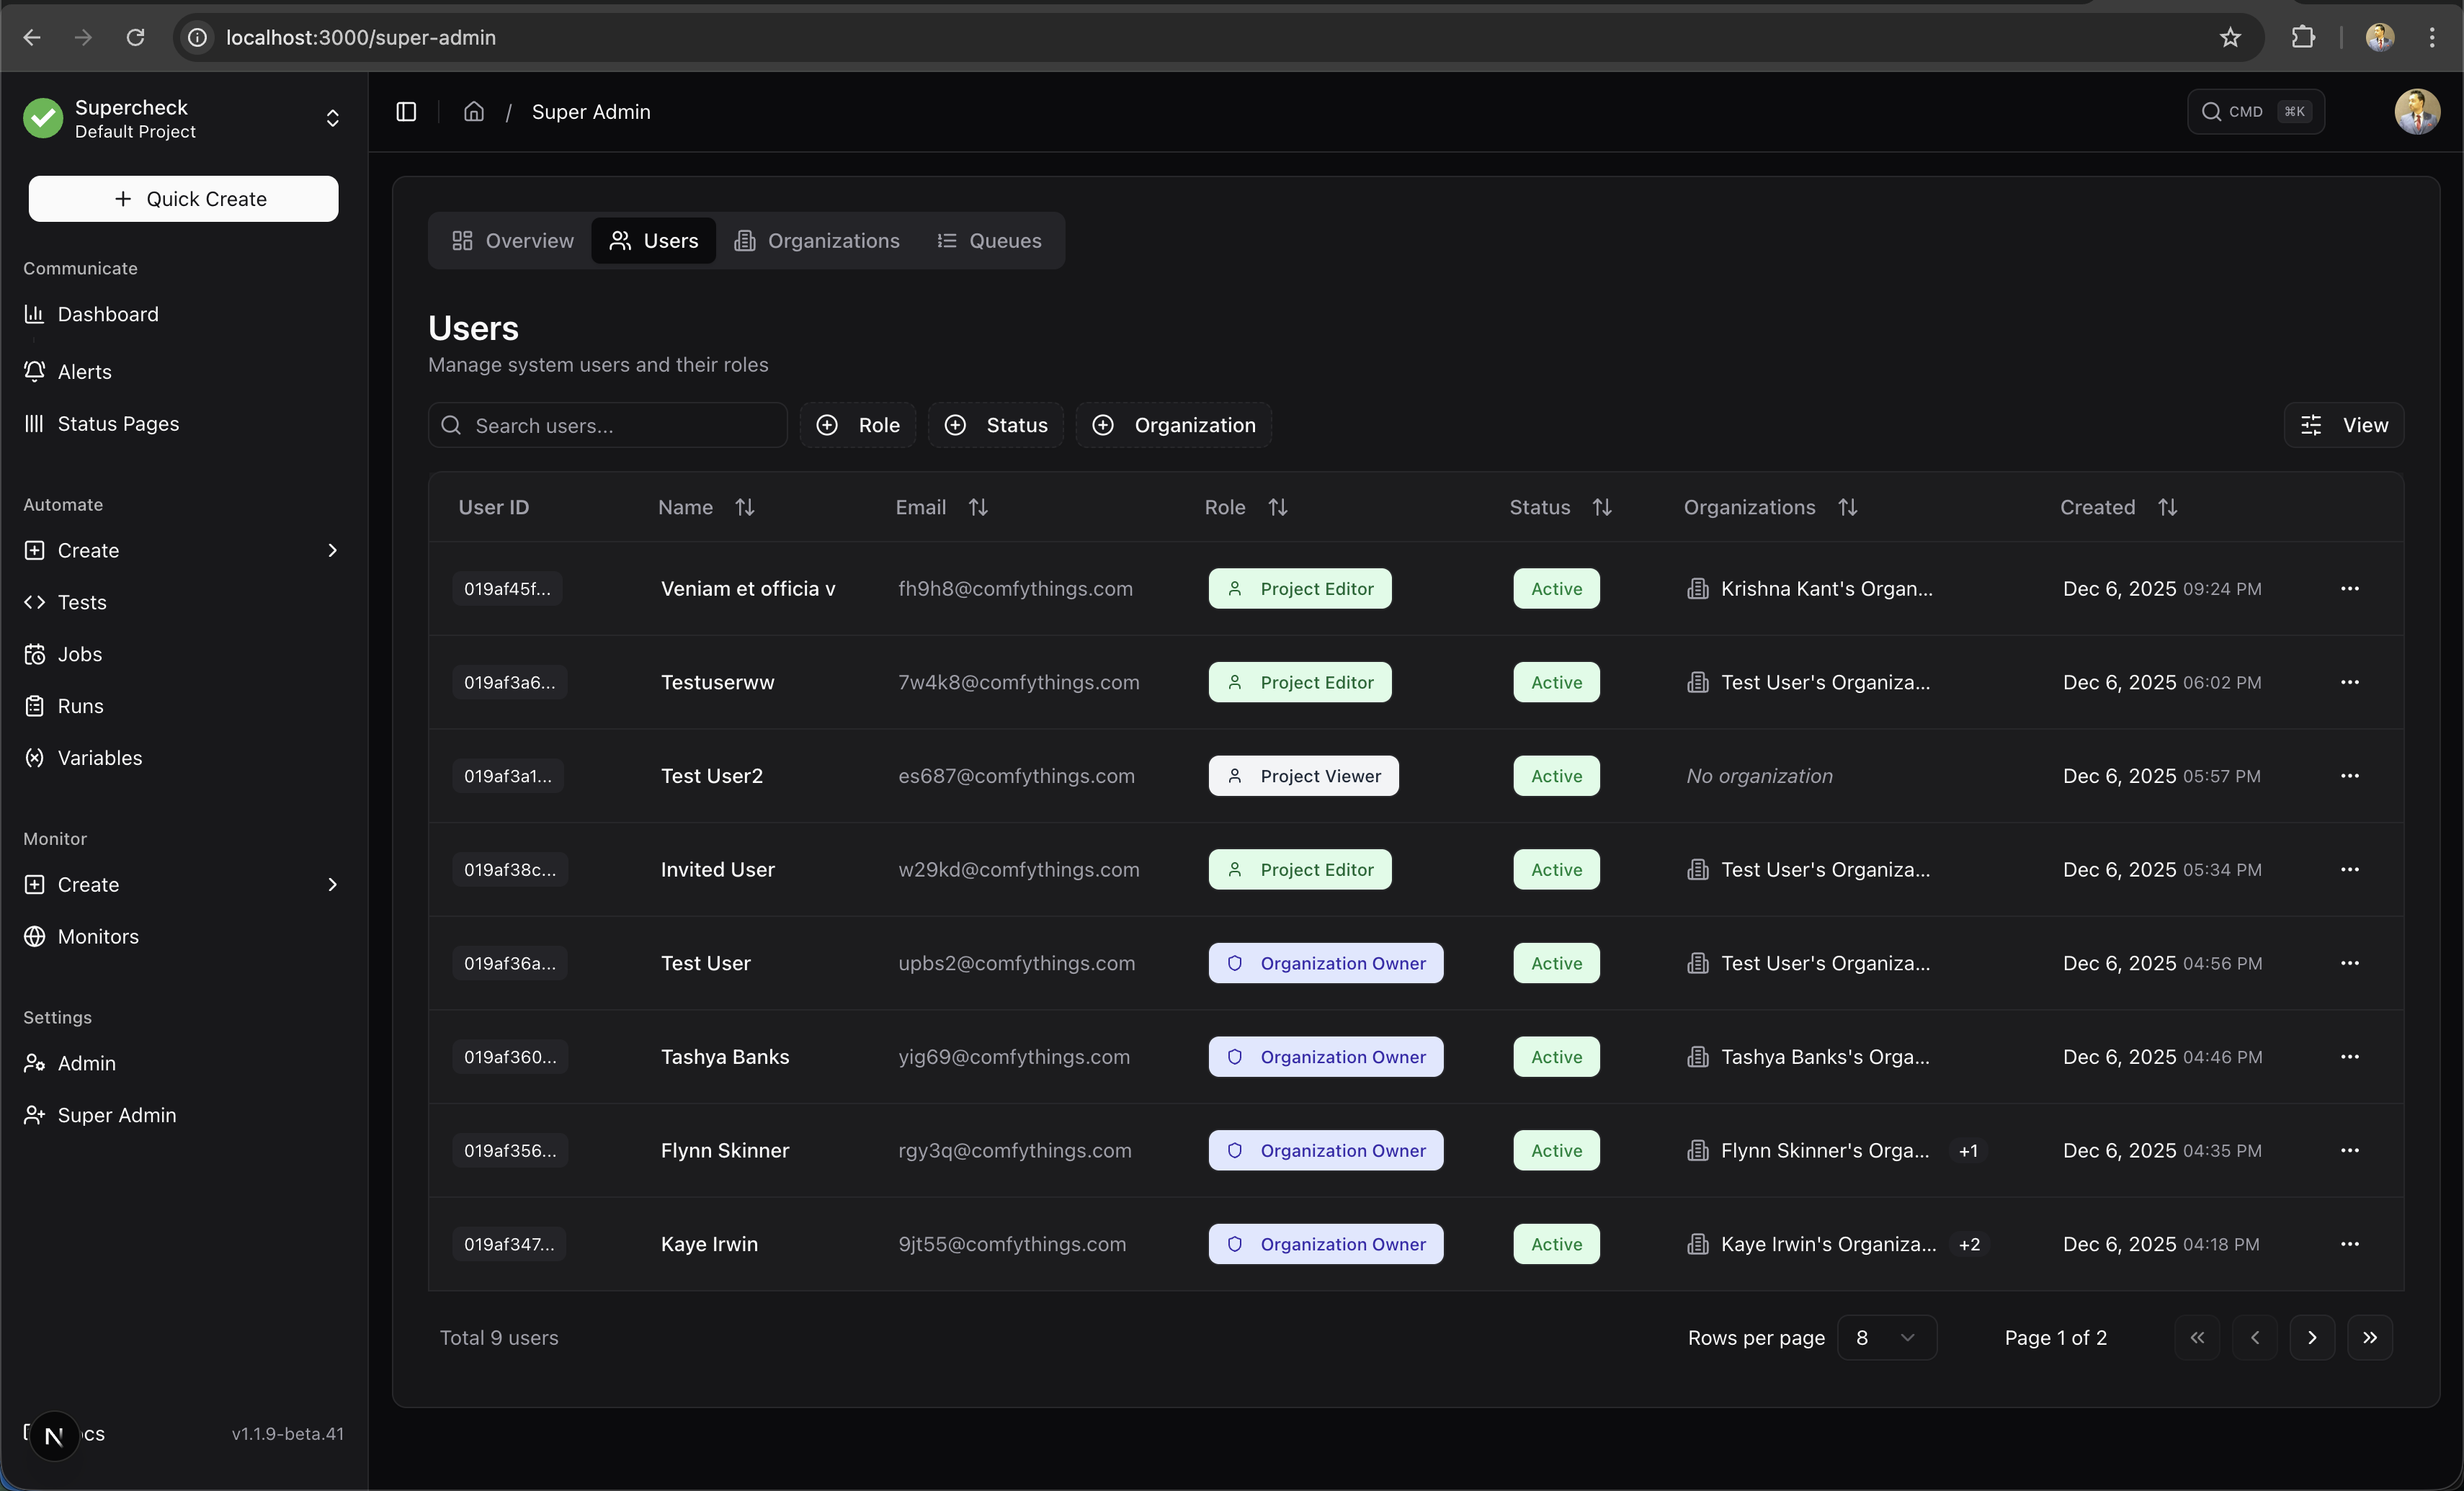
Users
Manage all users system-wide. View user details, organization memberships, and account status.
Queue Management
Monitor BullMQ queues for test execution, monitoring, and background jobs. View queue health, pending jobs, and processing status.
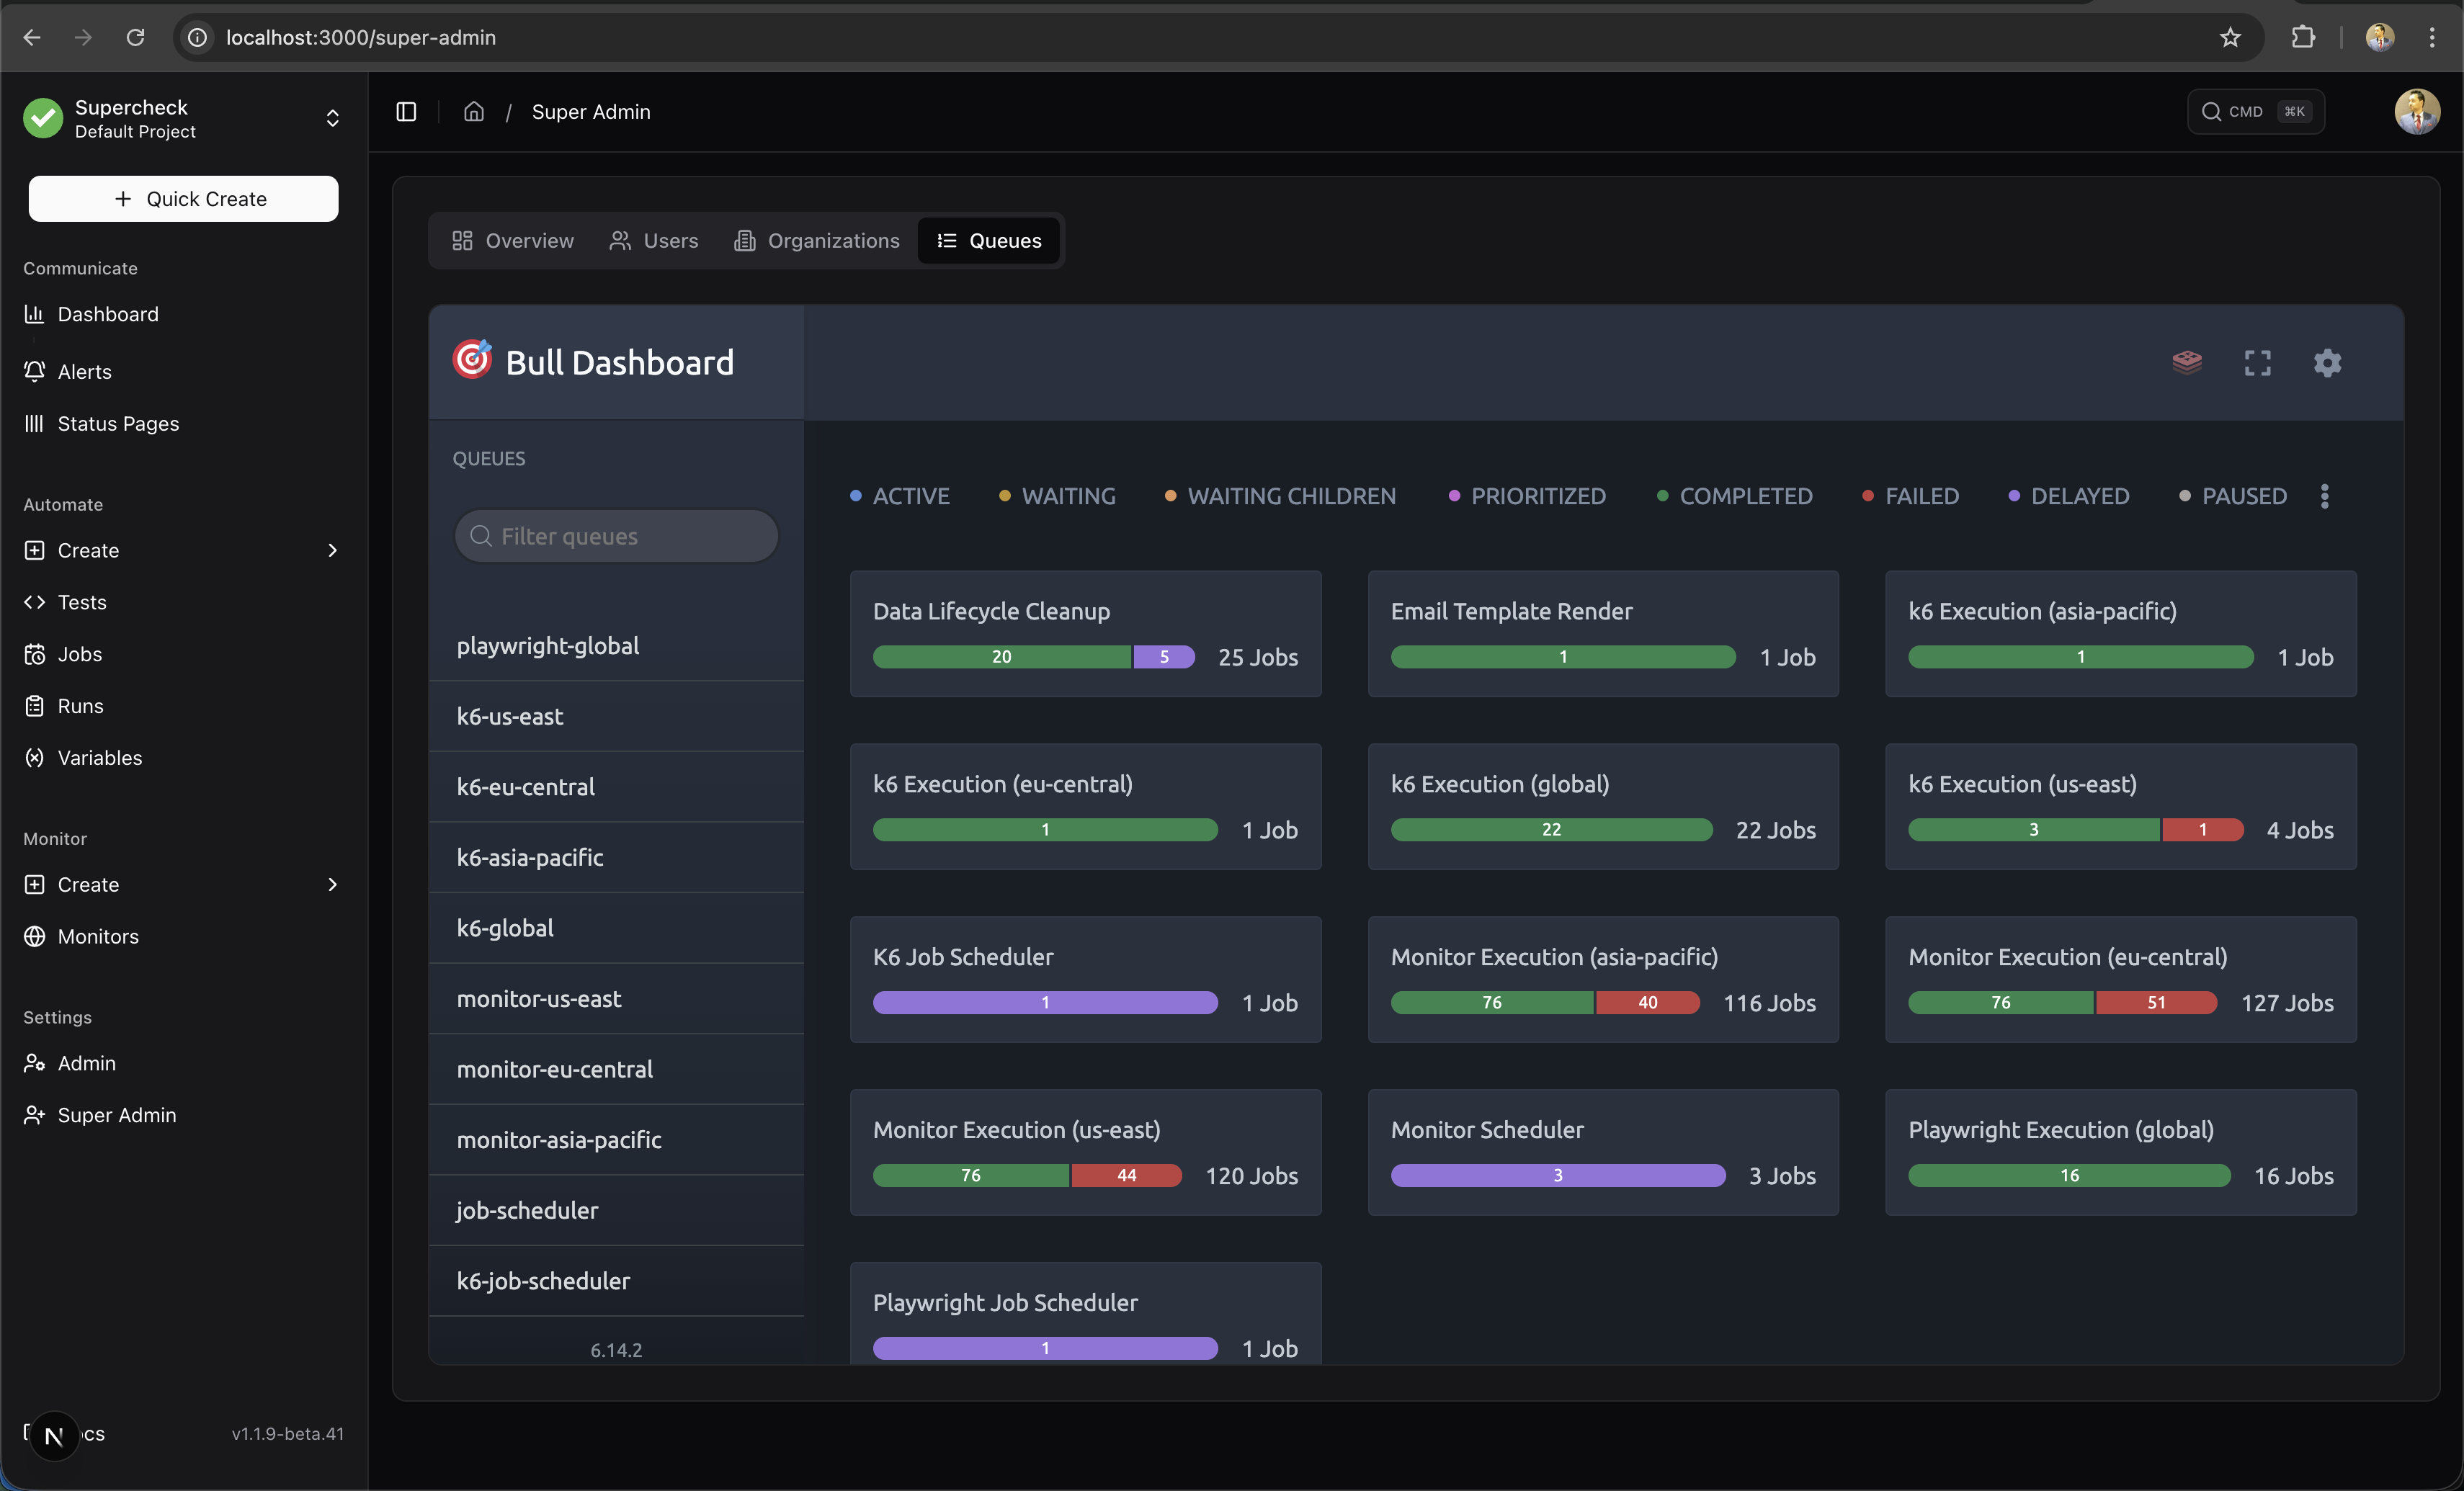
Capabilities
| Feature | Description |
|---|---|
| System Statistics | View total users, organizations, projects, jobs, tests, monitors, and runs |
| Organizations | View and manage all organizations |
| Users | Manage all users system-wide, ban/unban accounts |
| Impersonation | Log in as any user for troubleshooting |
| Scheduler Control | Initialize schedulers, view status, manually trigger jobs |
| Queue Monitoring | Real-time BullMQ queue stats via Bull Dashboard |
User Management
Manage all users across the platform:
- View Details — See user profile, email, and organization memberships
- Ban/Unban — Suspend accounts with a reason (banned users cannot log in)
- Impersonate — Log in as any user for troubleshooting
- Go to Super Admin → Users
- Find the user and click the menu (⋮)
- Select Impersonate
- If the user belongs to multiple organizations, select which one to impersonate into
- Click Impersonate User to confirm
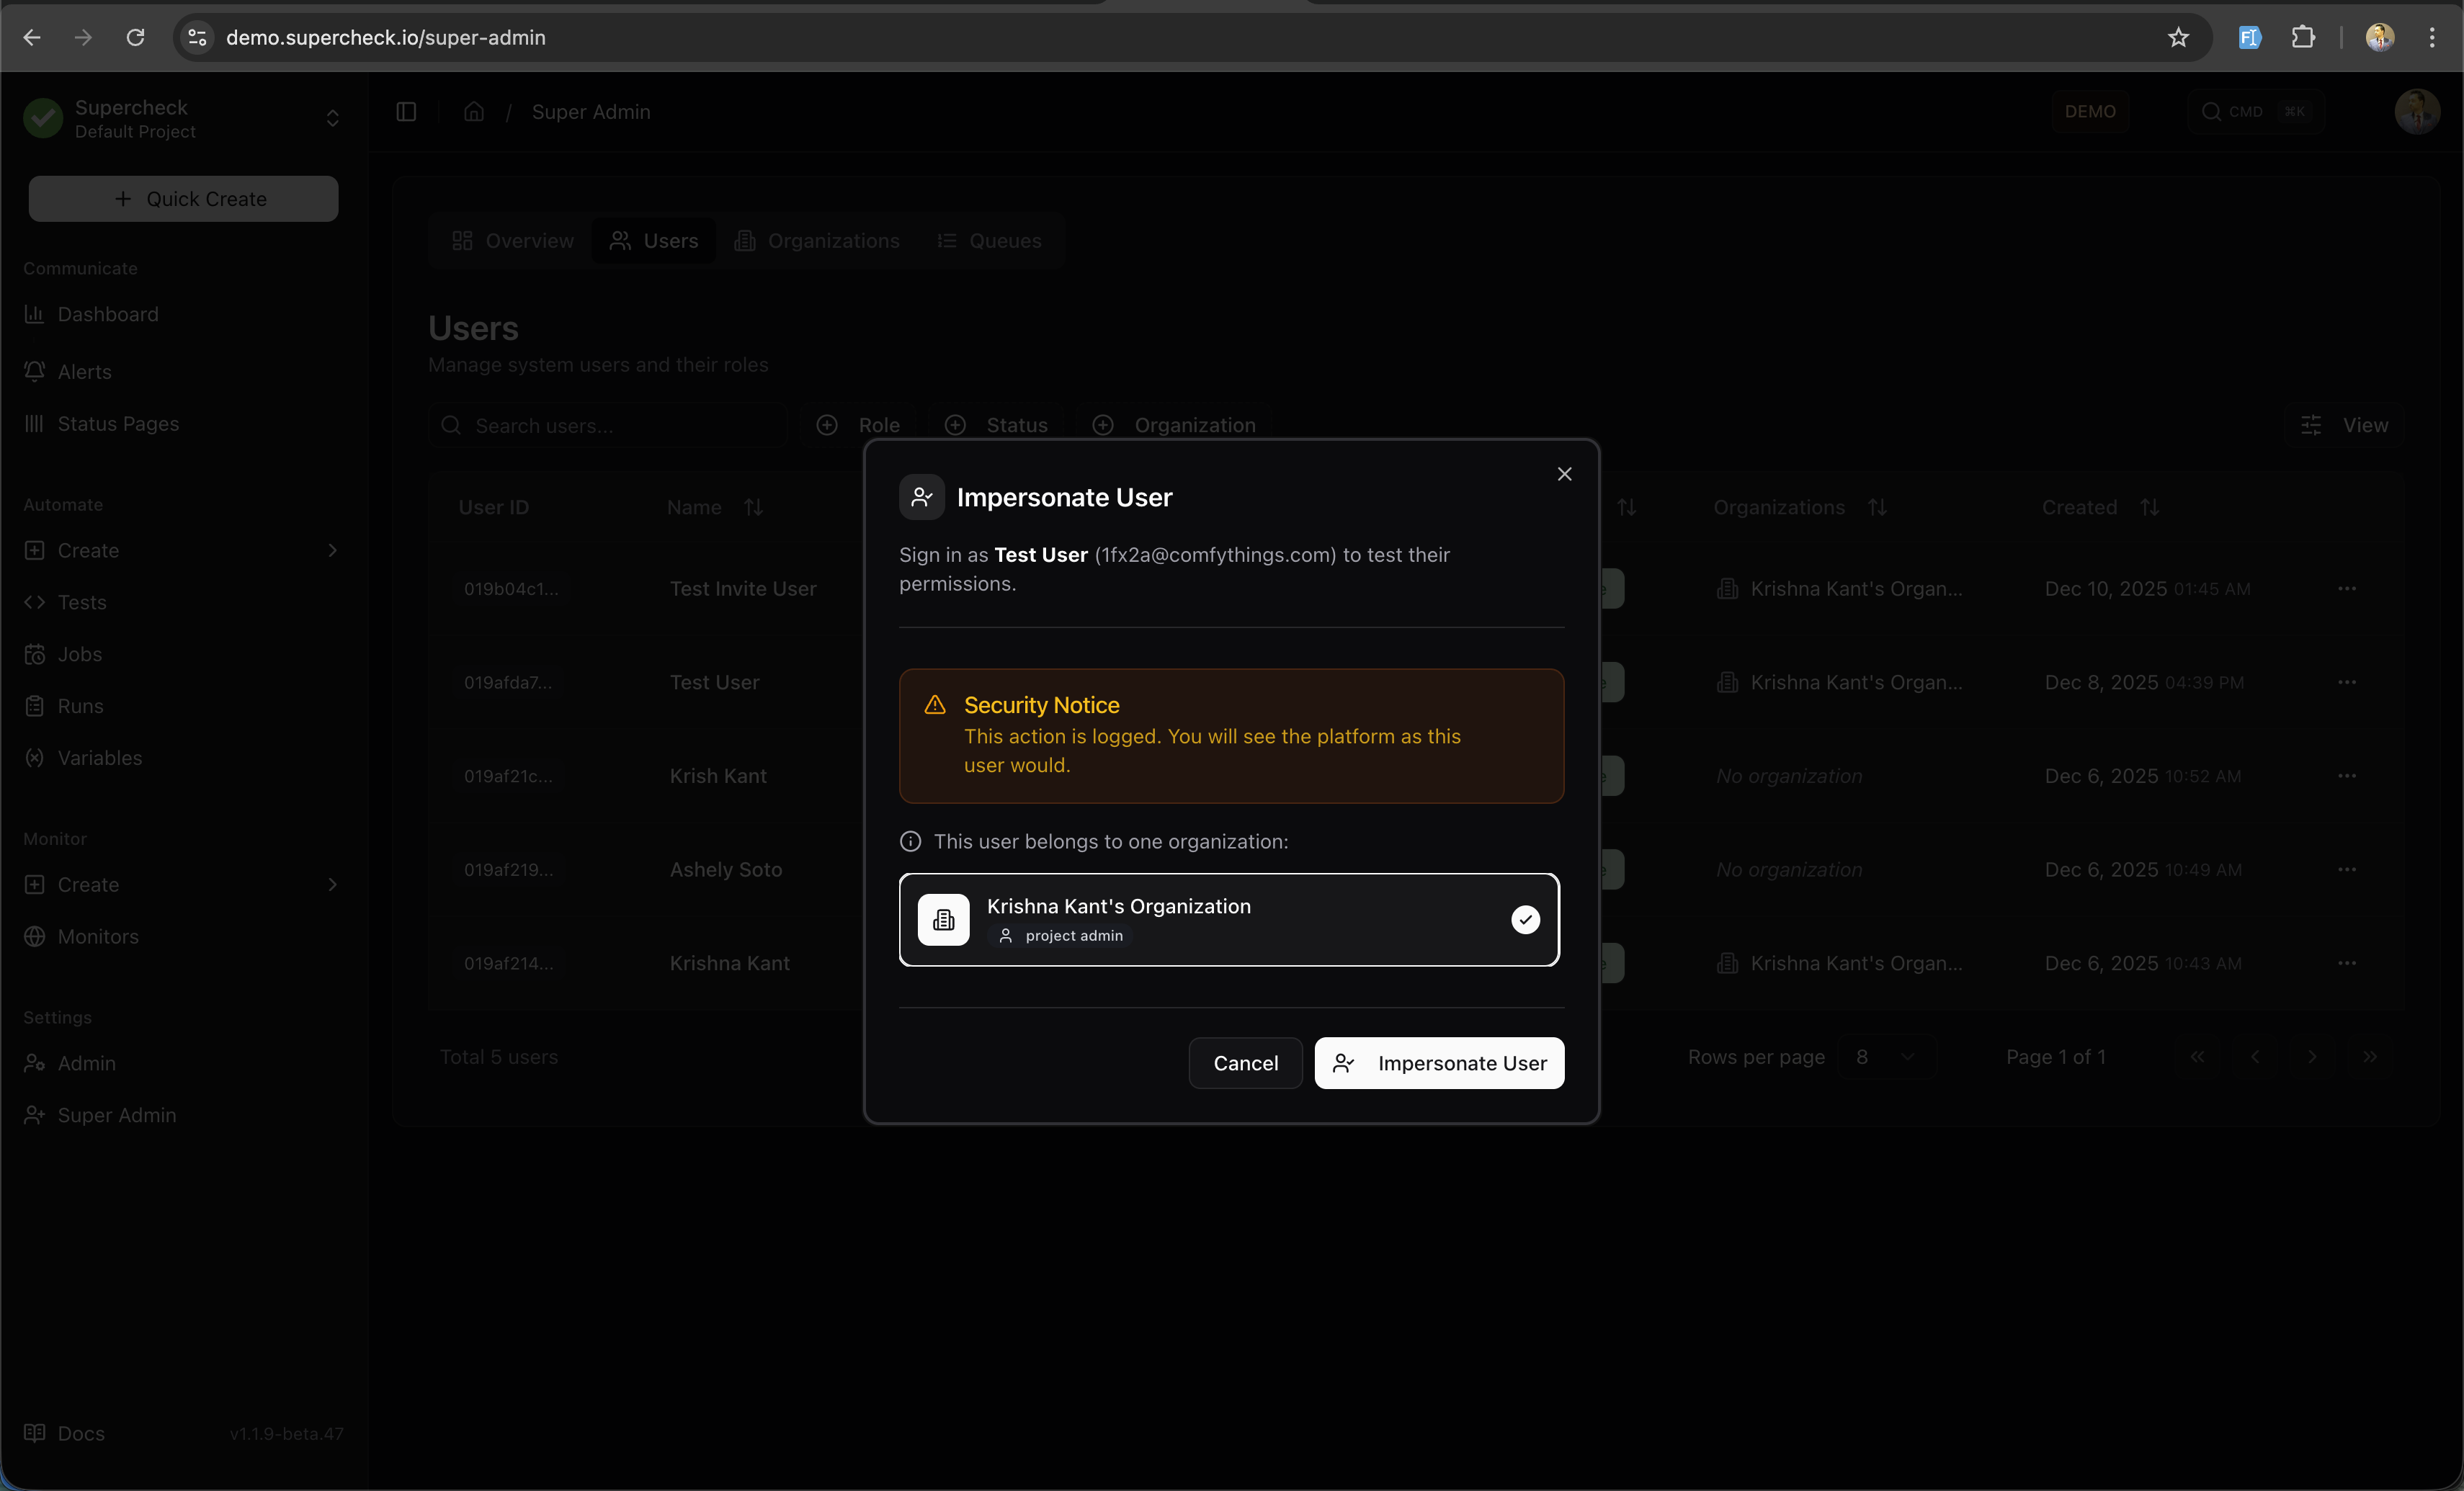
Using Impersonation:
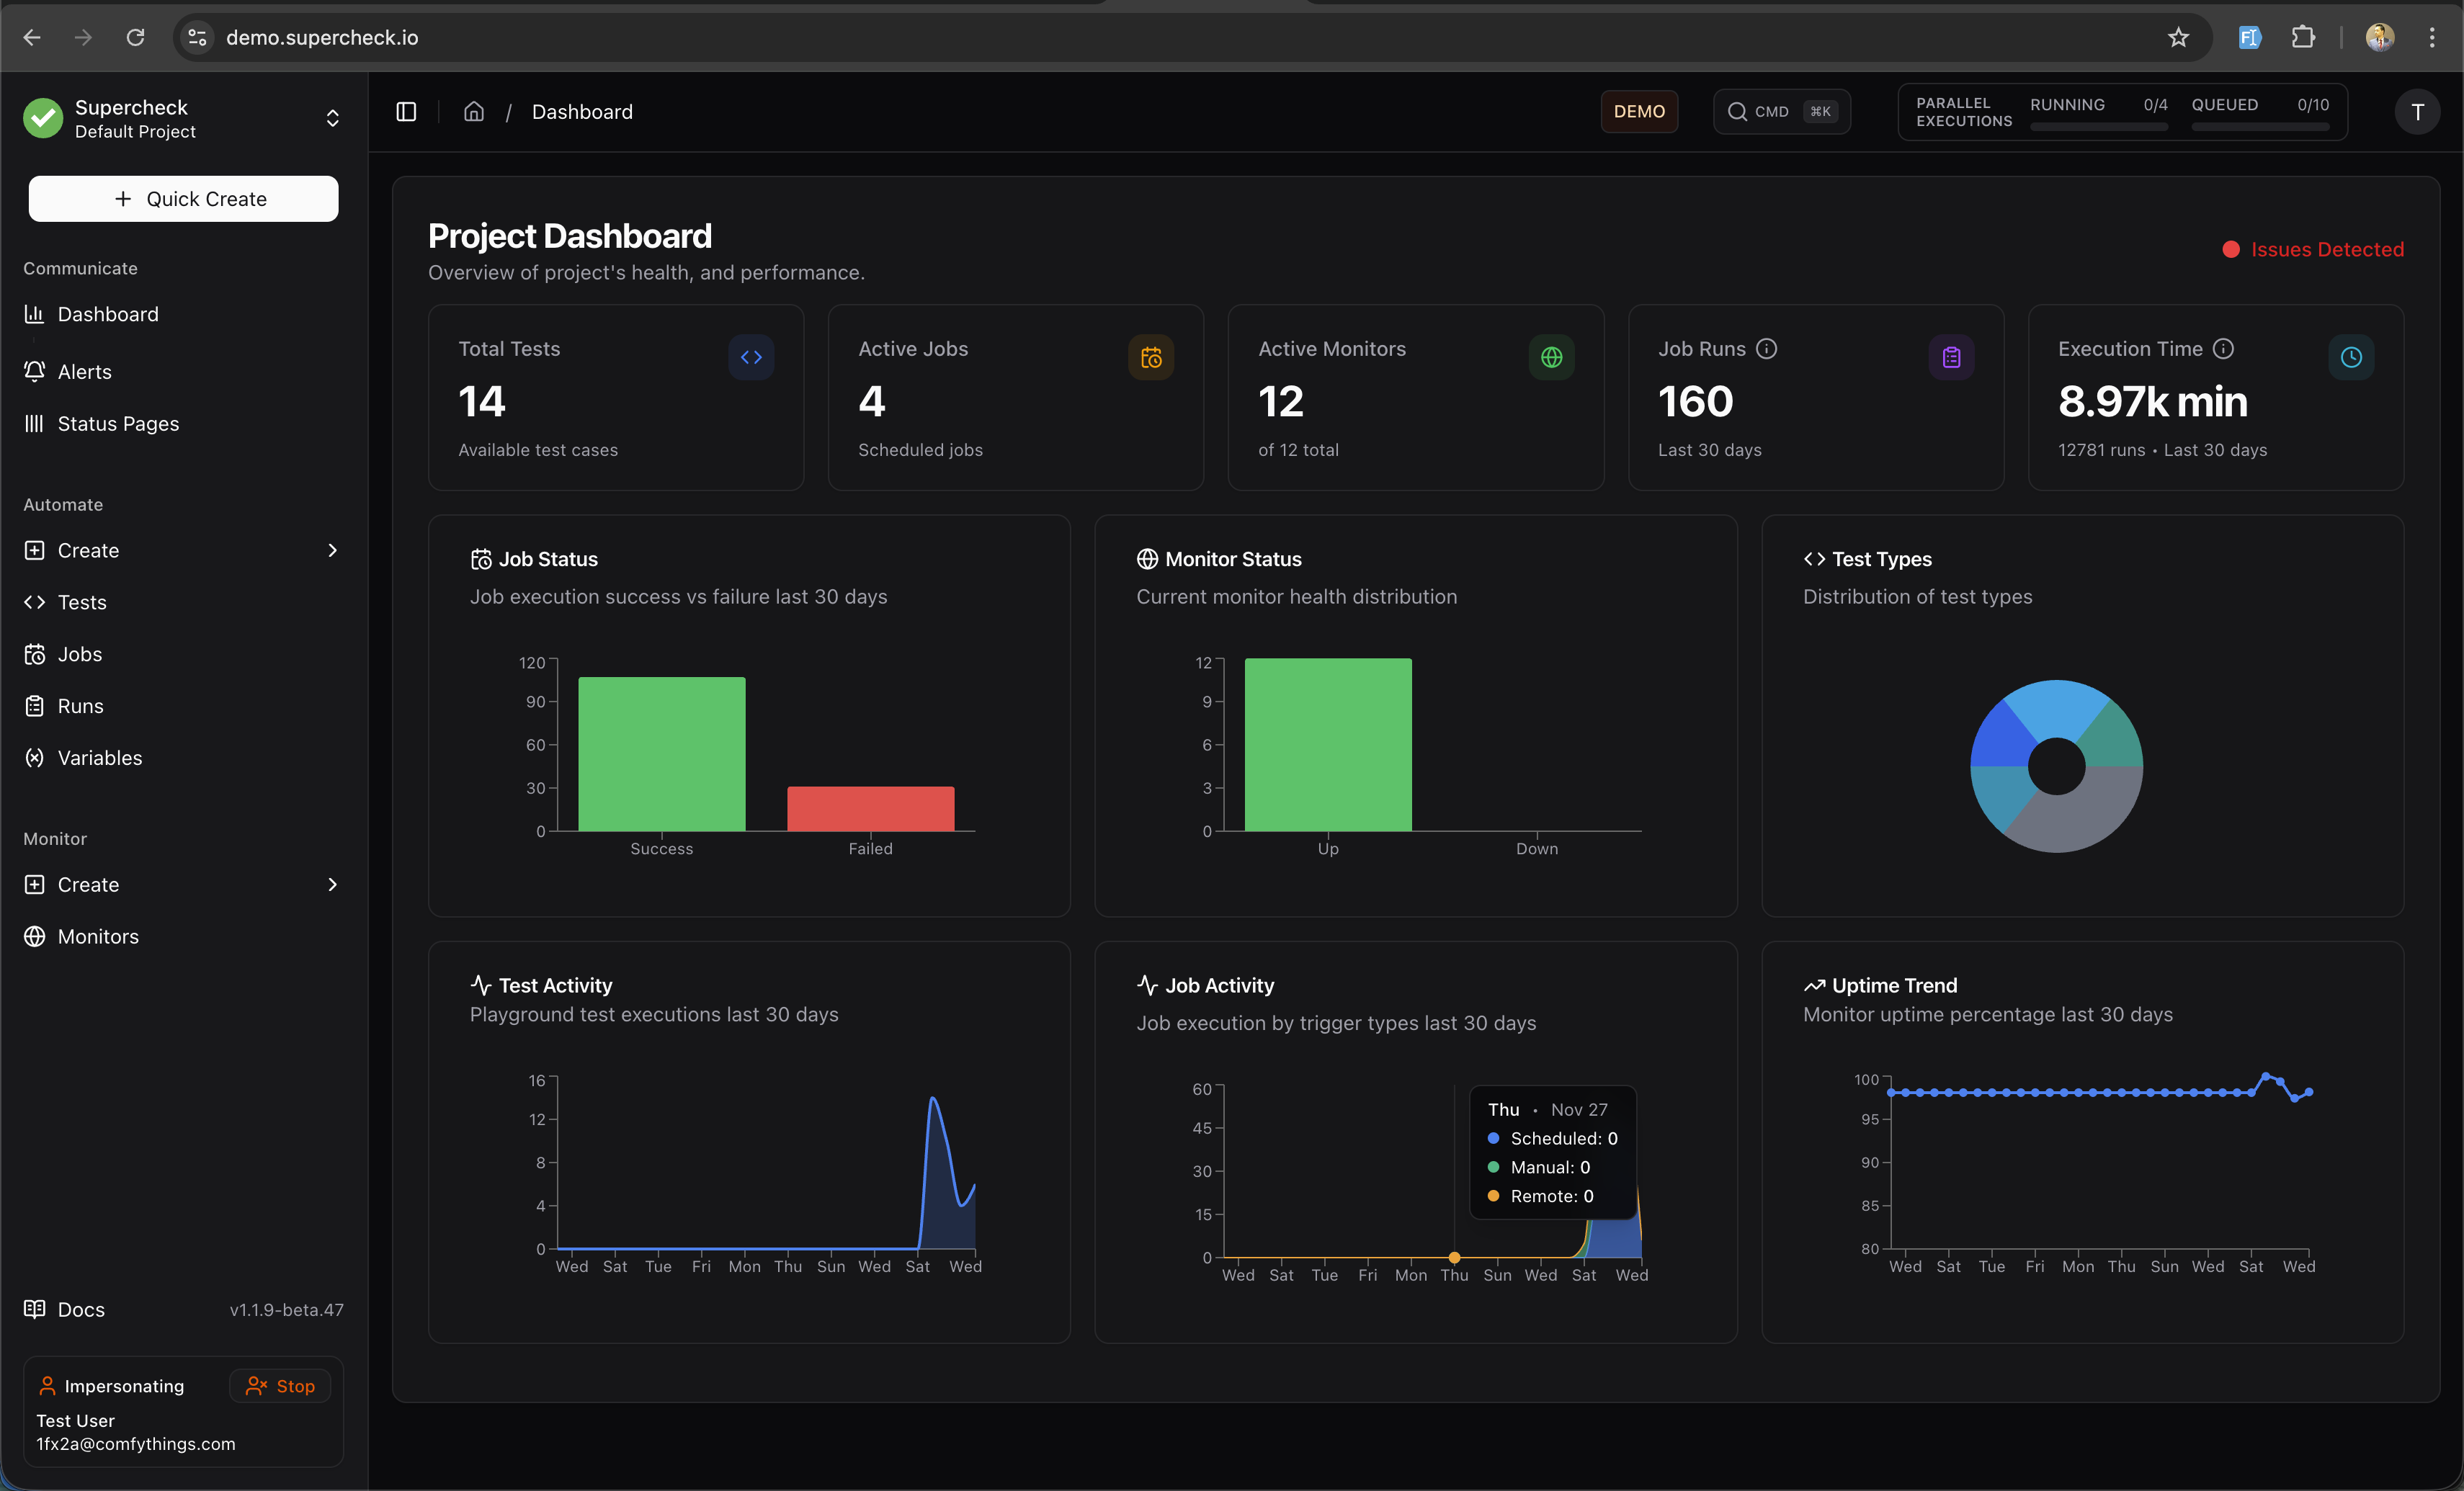
- a banner at the bottom shows "Impersonating" with the user's email
- Click Stop to return to your admin session
- You see the platform exactly as the user would
Security Notice: All impersonation sessions are logged for audit purposes. The original admin ID is preserved throughout the session.
To suspend a user account:
- Go to Super Admin → Users
- Find the user and click the menu (⋮)
- Select Ban User
- Enter a reason for the ban (minimum 20 characters)
- Click Ban User to confirm
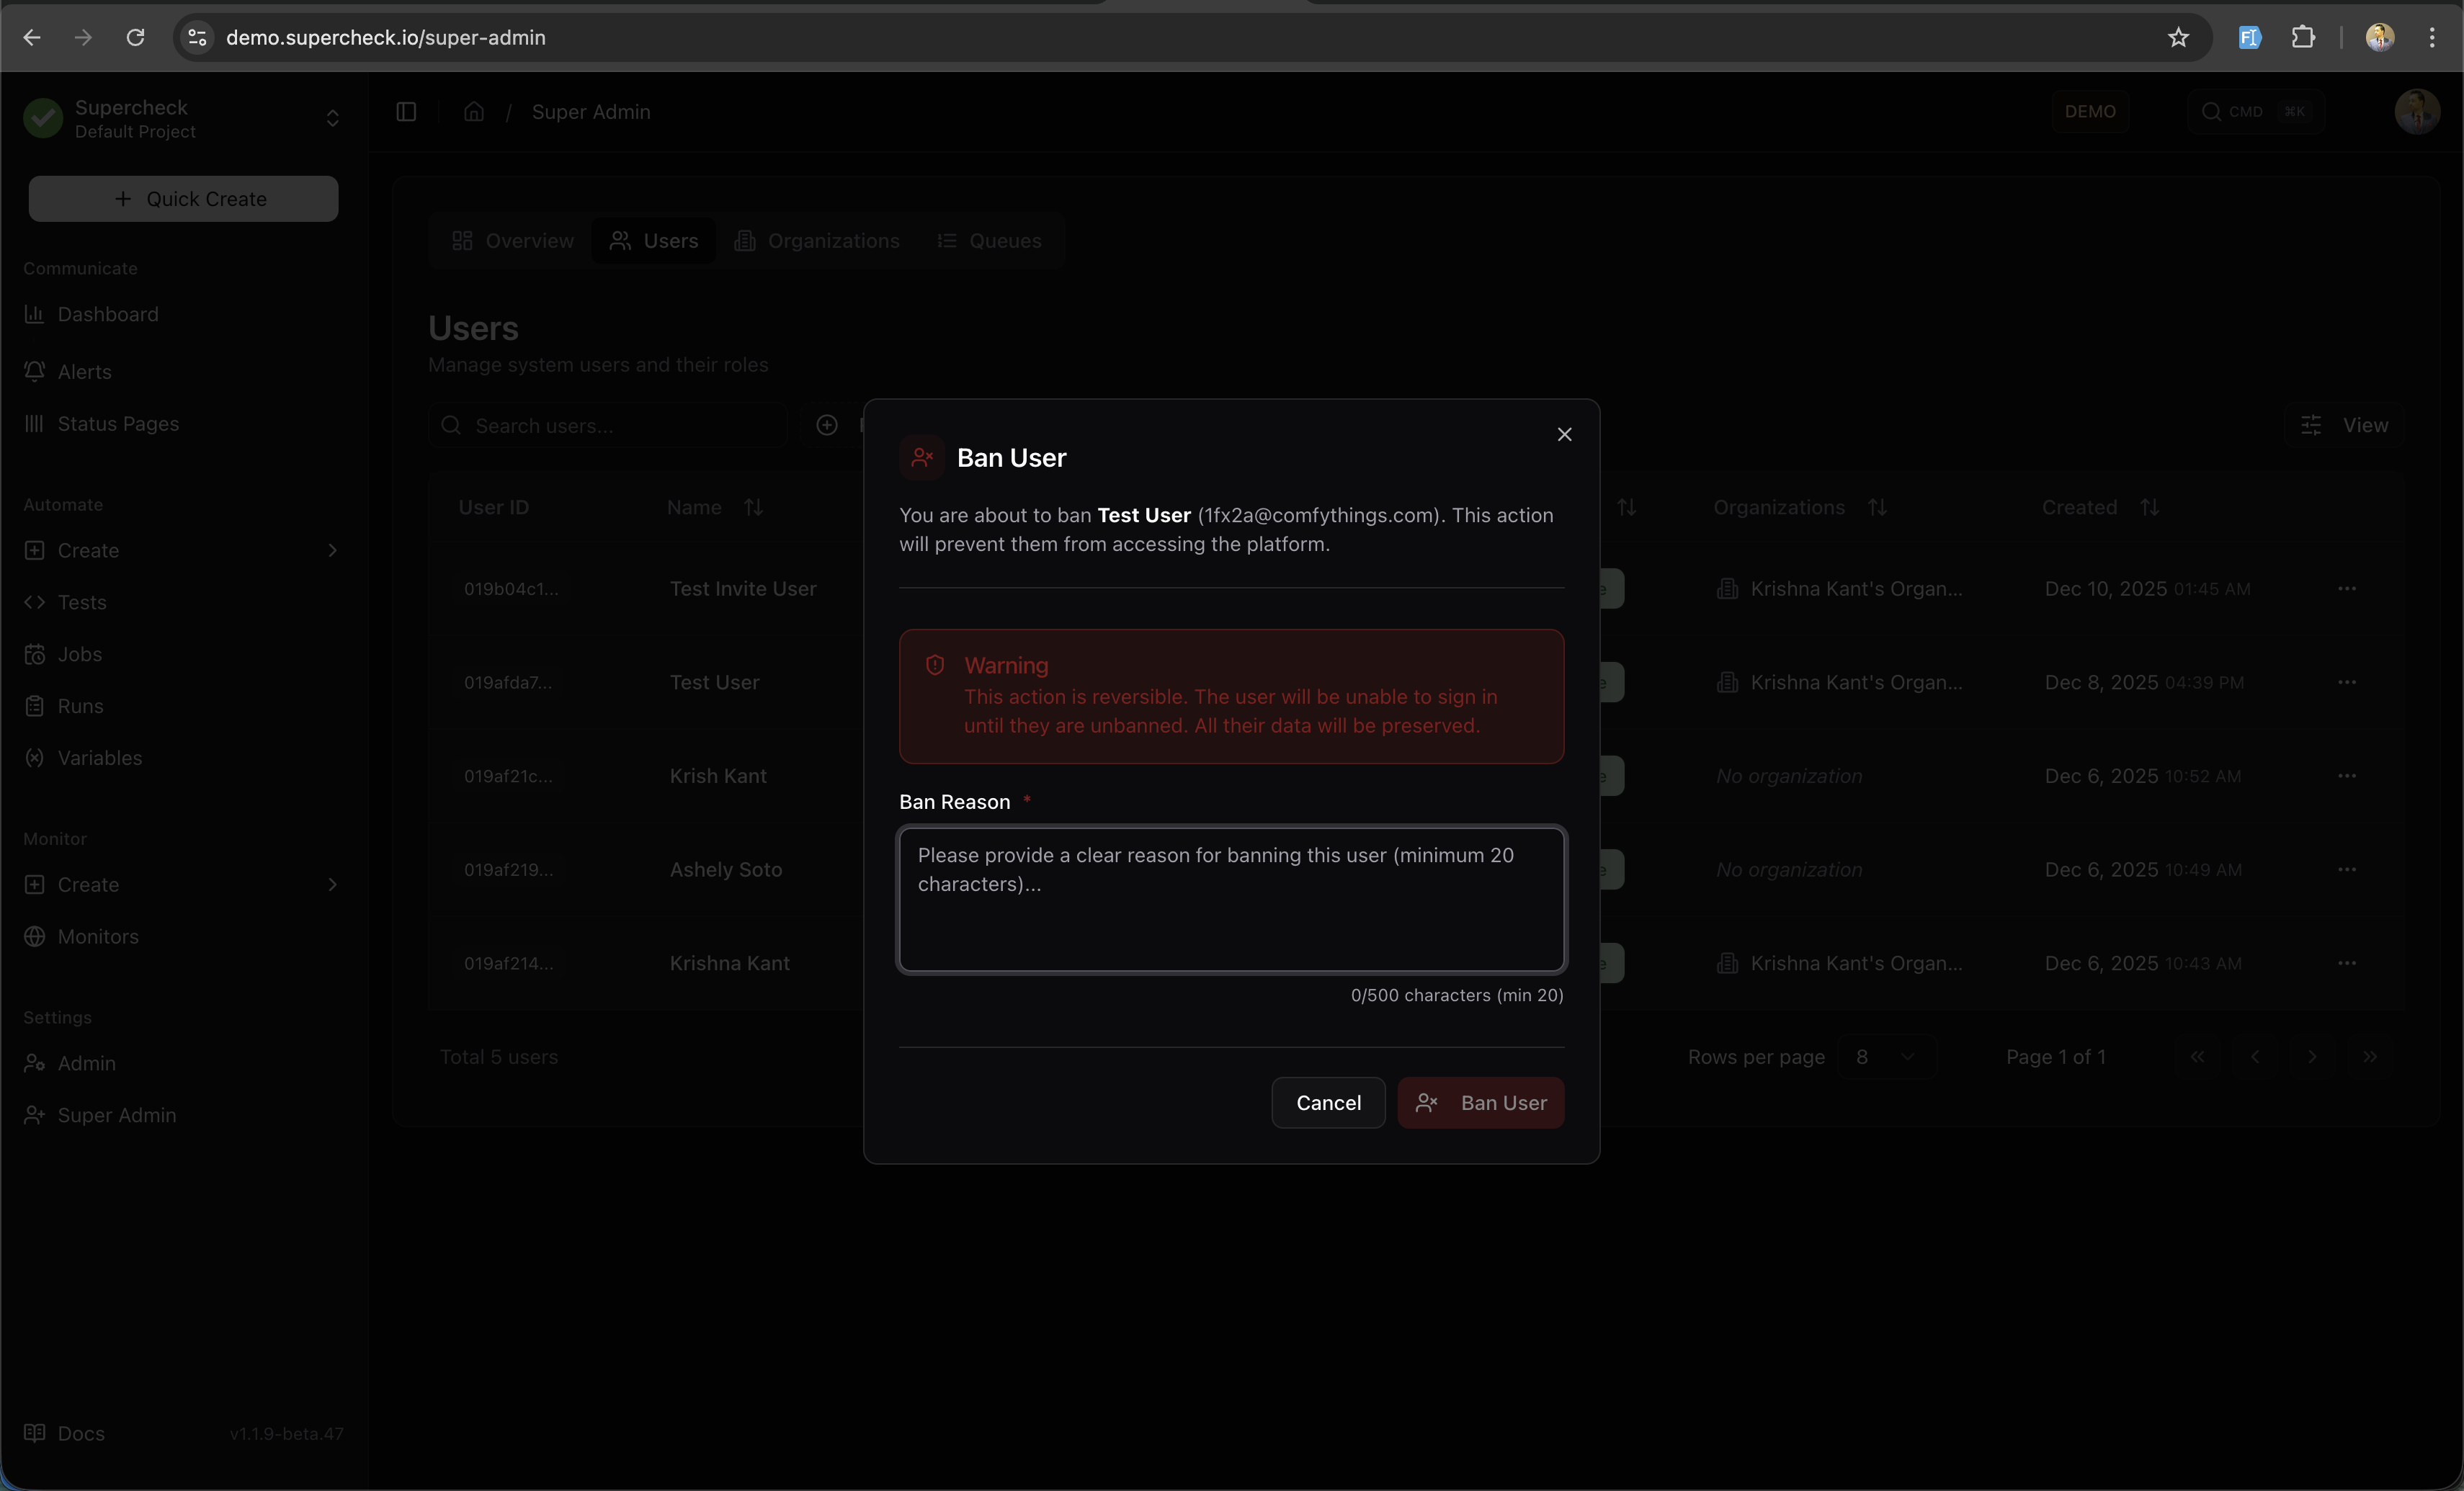
Reversible Action: Banning is reversible. The user will be unable to sign in until unbanned, but all their data is preserved. To unban, click Unban from the same menu.
Banned users see a "403 Account suspended" message when attempting to log in.
Scheduler Control
Manage the job scheduling system:
- Initialize Schedulers — Start or restart the scheduling service
- View Status — Check scheduler health and active jobs
- Manual Triggers — Force-run scheduled jobs for testing
Security
- Single Admin — Only one super admin email is supported per deployment
- Validation — Multiple emails in
SUPER_ADMIN_EMAILwill cause a startup error - Audit Trail — All super admin actions are logged with timestamps
- Session Tracking — Impersonation sessions preserve the original admin ID for accountability